QMetry and Reports Offline Installation on Linux - 2 Tier
This topic describes how to install QMetry Application and QMetry Reports in a 2-tier Linux environment without an internet connection. You download the Docker images on a machine with internet access, transfer them to the servers, load them, and then run the installer in offline mode.
QMetry runs in Docker containers on Apache Tomcat 11.0.5, MySQL 8.4.8, and OpenJDK 17.0.2.
Deployment Architecture
The 2-tier deployment uses two Linux servers. The following table lists the role of each server.
2 Tiers | Installations |
|---|---|
Server 1 | QMetry Application and QMetry Database |
Server 2 | QMetry Reports and and QMetry Report Database |
Prerequisites
Confirm every item in Pre-requisites for QMetry Application and Report Server Installation. Then confirm the following:
Prerequisite | What to confirm |
|---|---|
Required commands | Ensure unzip and, curl are available. Docker commands must run successfully. |
Operating System | Linux - Ubuntu 24.04, |
Docker Version | 20.10.13 |
Docker Compose Version | v2.40.0 |
Installation files | You have the QMetry_Linux_Installer.zip files and Docker credentials from QMetry Support. |
Root access | Docker installation requires root user access. To install using a non-root user, refer to Installing QMetry as a Standard User before starting the install on both QMetry and Report servers. |
Protocol | Configure QMetry Application and Reports to use the same protocol (HTTP or HTTPS). If integrating Jira, use the same protocol for Jira and QMetry. |
Storage | Ensure sufficient disk space is available. Docker stores data under /var/lib by default unless configured otherwise. |
Service startup | Configure Docker to start automatically after a server reboot. |
In addition to this, ensure the following
Configure docker service on QMetry Application and Report servers to start automatically on reboot of servers.
The following Ports should be open:
Application and Report servers should be in the same network.
Report Server should be able to communicate with Application Server over 80/443 and Database Server 3306/DB Port.
Ports 8080 and 3306 should be enabled/open on Reports Server to allow connections from the QMetry application server.
Required Ports
This table consolidates the ports referenced throughout the installation procedure.
Installation | Ports that need to be enabled and should be available for use |
|---|---|
QMetry Application | 80/443 & 3306 |
QMetry Reports | 80/443, 8081 & 3306 |
Redis | 6379 |
ActiveMQ | 61616 or 8161 |
Download the Docker Images of QMetry
Perform the following steps on a machine that has internet access, Docker installed, enough disk space for the image archives, and permission to transfer files to the target servers.
Docker Login. Contact QMetry Support if you do not have docker credentials.
docker login
Create a directory for the image archives.
sudo mkdir -p /opt/qtm
Pull the required images
docker pull qmetry/qmetry:latest
docker pull qmetry/qmetry:appdb848
docker pull qmetry/qmetry:cdc
docker pull qmetry/qmetry:sync
docker pull qmetry/qmetry:reportdb848
Verify that the images are available.
docker images
Save the images as TAR archives.
docker save -o /opt/qtm/qmetryapp.tar qmetry/qmetry:latest
docker save -o /opt/qtm/qmetrydb.tar qmetry/qmetry:appdb848
docker save -o /opt/qtm/qmetrycdc.tar qmetry/qmetry:cdc
docker save -o /opt/qtm/qmetrysync.tar qmetry/qmetry:sync
docker save -o /opt/qtm/qmetryreportdb.tar qmetry/qmetry:reportdb848
Transfer files to the target servers
Copy the TAR files to /opt/qtm on each target server, or adjust the commands below if you use a different directory.
Destination
Required Files
Server 1 – Application
QMetry_Linux_Installer.zip
qmetryapp.tar
qmetrydb.tar
Server 2 – Reports
QMetry_Linux_Installer.zip
qmetrycdc.tar
qmetrysync.tar
qmetryreportdb.tar
Load the images on the application server
Run the following commands to load the images and verify that they are listed. If you saved the files in a different directory, replace /opt/qtm.
# Load the transferred image tar files
sudo docker load -i /opt/qtm/qmetryapp.tar
sudo docker load -i /opt/qtm/qmetrydb.tar

# Verify the images were restored correctly
sudo docker images
Verify that both the QMetry Application and Application Database images are listed before continuing.
Install QMetry Application
To install QMetry Application, perform the following steps:
Extract the installation files
Copy the
QMetry_Linux_Installer.zipfile to the server, go to the directory that contains the file, and then run the following command to extract it:unzip QMetry_Linux_Installer.zip
Run the following commands to start the installer:
cd QMetry_Linux_Installer
sudo su
chmod +x install.sh
./install.sh
When the installer asks whether to perform an online installation, enter N.
Options
Allowed Values
Default Value
Recommended Value
Do you want to make an online installation (Y/N)?
Y, y, N, n
Y
N
Enter the Docker credentials that you received from QMetry Support.
At the Main Installation Menu, enter 2 to install QMetry Application.
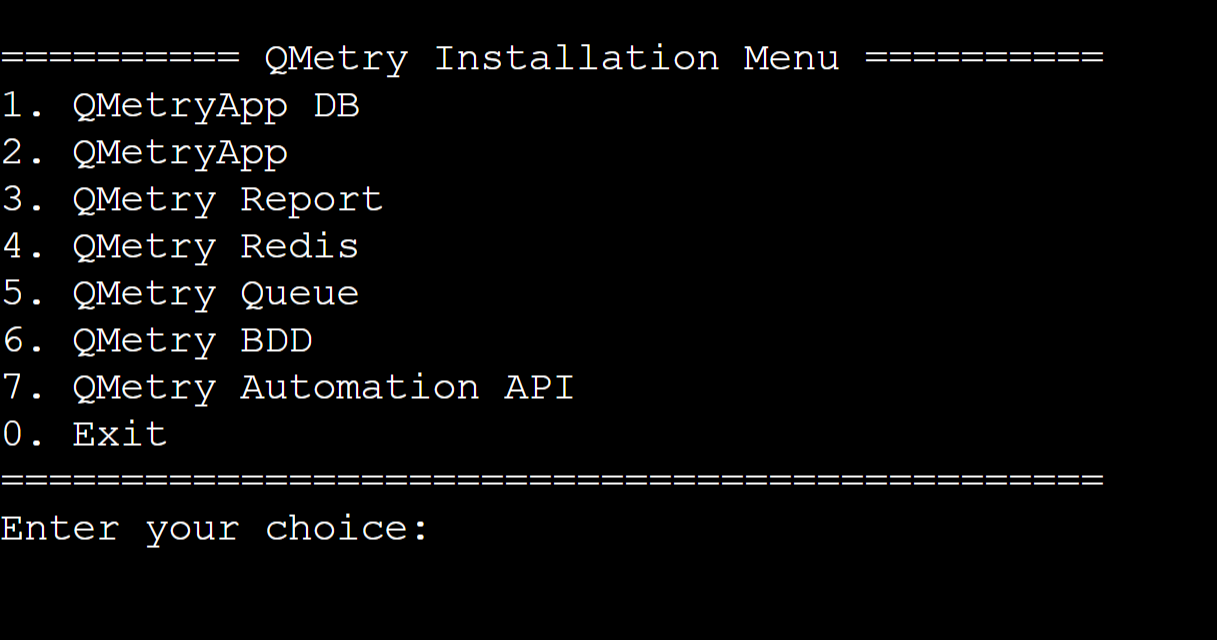
Enter a directory path on the host machine to store QMetry data, such as attachments, licenses, imports, and exports. You can enter any valid path. If the directory does not exist, the installer creates it.
Options
Example
Please enter QMetry application directory
/opt/qmetryapp
Enter the configuration parameters
Options
Details
Default Value
Example
Enter QMetry database schema
QMetryApplication Database schema name.
qmetry
qmetry
Enter QMetry database password for root user
Enter QMetryApplication Database Password for the root user.
-
QMetry@123
Enter Email for QMetryadmin user
Enter QMetryuser email address for Admin.
-
Enter password for QMetryadmin user
Enter QMetryuser password for Admin.
-
Admin@123
Enter Min. Heap Memory for the web server in GB
Enter Heap Memory in GB
2
2
Enter Max. Heap Memory for the web server in GB
Enter Heap Memory in GB
4
4
Enter QMetryDatabase Connection Pool Size
Enter Pool Size in number format
100
100
Wait for the installer to report that the QMetry Application installation is complete.
QMetry Application Installation is complete
Enter 0 to exit the installer.
Run the following command to verify that the containers are running:
docker ps
The output lists the running containers with their IDs and names.
Apply your license. Use the option that matches your license type:
Evaluation license: Use the evaluation license that you received with the installation. It is valid for 30 days.
Commercial license: Run the following command to find the MAC address of the Ethernet card, for example eth0 or eth1. If the ifconfig command is not installed, run ip link instead. Then send the MAC address and the domain name of your server to QMetry Support to request your license.
ifconfig
When you receive the license.key file from QMetry Support, see Apply License File - QMetry Tomcat installed on docker.
Open the application in a browser:
http://<your IP address OR domain name>
Log in with the user name admin and the password that you entered in step 7.
Update the administrator profile
Go to Admin Profile and Edit the Profile.
Update the administrator email address in the Email box.
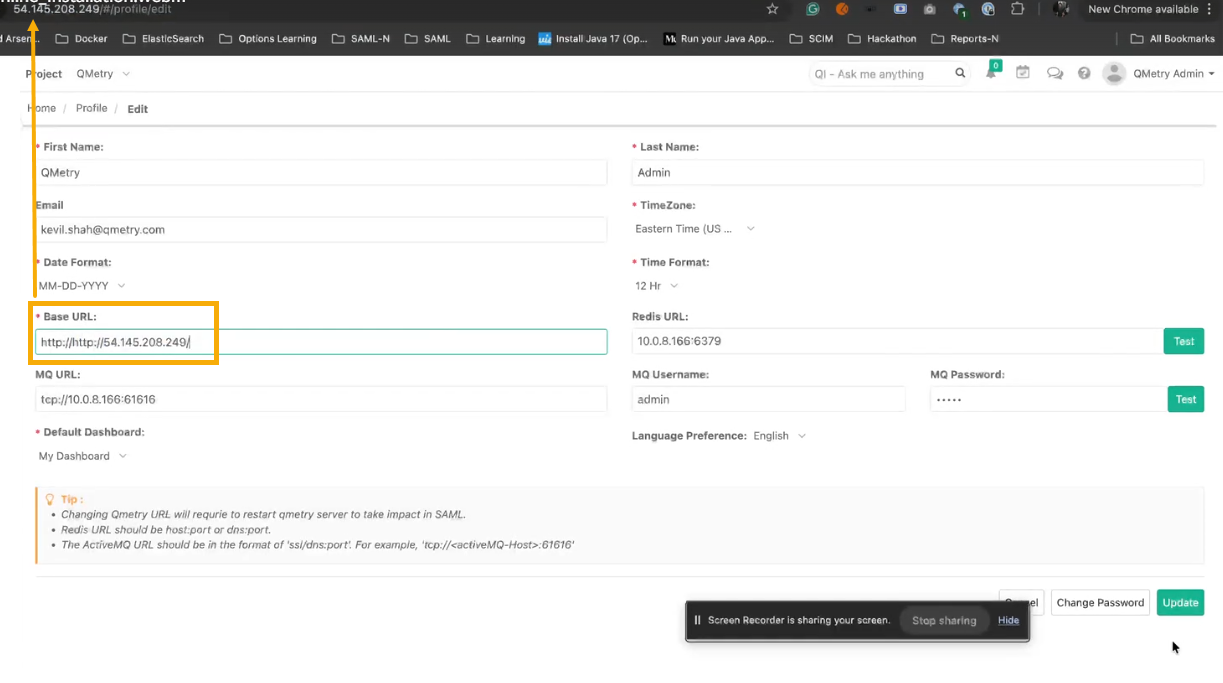
In the Base URL field, enter your QMetry URL.
Click Update.
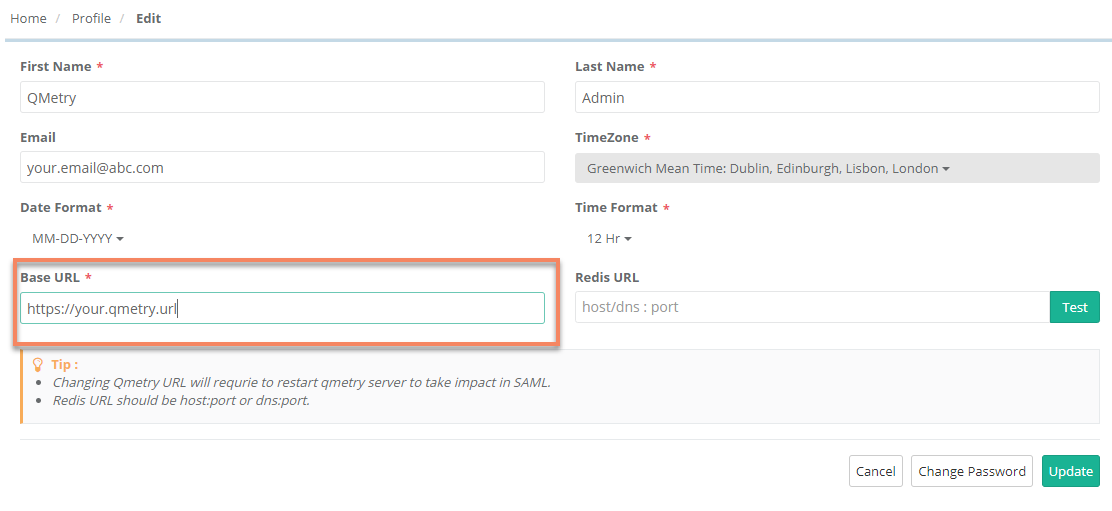
Optional: Configure additional Tomcat settings. QMetry installs with default values for minimum and maximum heap memory. You can change them to match your hardware. For details, see Additional Configuration.
Note
MySQL runs on port 3306. To connect to it, use the user name root, and the password and schema that you entered in step 7.
Back up the application data directory and the database on a regular schedule.
Install Redis, ActiveMQ, and the Automation API Feature
QMetry Reports require the Redis server and the ActiveMQ server.
Install the Redis server by following the Installing Redis Caching Server for Offline Installations. Install ActiveMQ and the Automation API feature by following the Install/Upgrade Automation API Feature for Offline Installations..
Before installing Reports, confirm that the Redis and ActiveMQ containers are running and are configured in QMetry Application.
Install QMetry Reports
Prerequisites
Before you install QMetry reports, verify the following.
QMetry App is installed and running.
The QMetry Application URL is set in the Base URL box of the administrator profile.
Active MQ and Redis containers are running and configured in QMetry App.
Redis is reachable on port 6379 and ActiveMQ is reachable on port (61616 and 8161).
QMetry Application is reachable on port 80 or 443 and the Application database is reachable on port 3306.
Load and verify the Reports images
sudo docker load -i /opt/qtm/qmetrycdc.tar
sudo docker load -i /opt/qtm/qmetrysync.tar
sudo docker load -i /opt/qtm/qmetryreportdb.tar
sudo docker images
Verify that all three Reports images are listed before continuing.
Steps to Follow for QMetry Report Installation
To install QMetry Reports on the second server, perform the following steps:
Get the installation zip file
Connect to the report server, upload the
QMetry_Linux_Installer.zipfile to the /opt directory, and then run the following commands to extract it:sudo su - cd /opt unzip QMetry_Linux_Installer.zip cd QMetry_Linux_Installer/
Run the following commands to start the installer:
chmod +x install.sh
./install.sh
When the installer asks whether to make an online installation, enter N.
Options
Allowed Values
Default Value
Recommended Value
Do you want to make an online installation (Y/N)?
Y, y, N, n
Y
N
Enter the Docker credentials that you received from QMetry Support.
At the Main Installation Menu, enter 3 to install QMetry Reports.
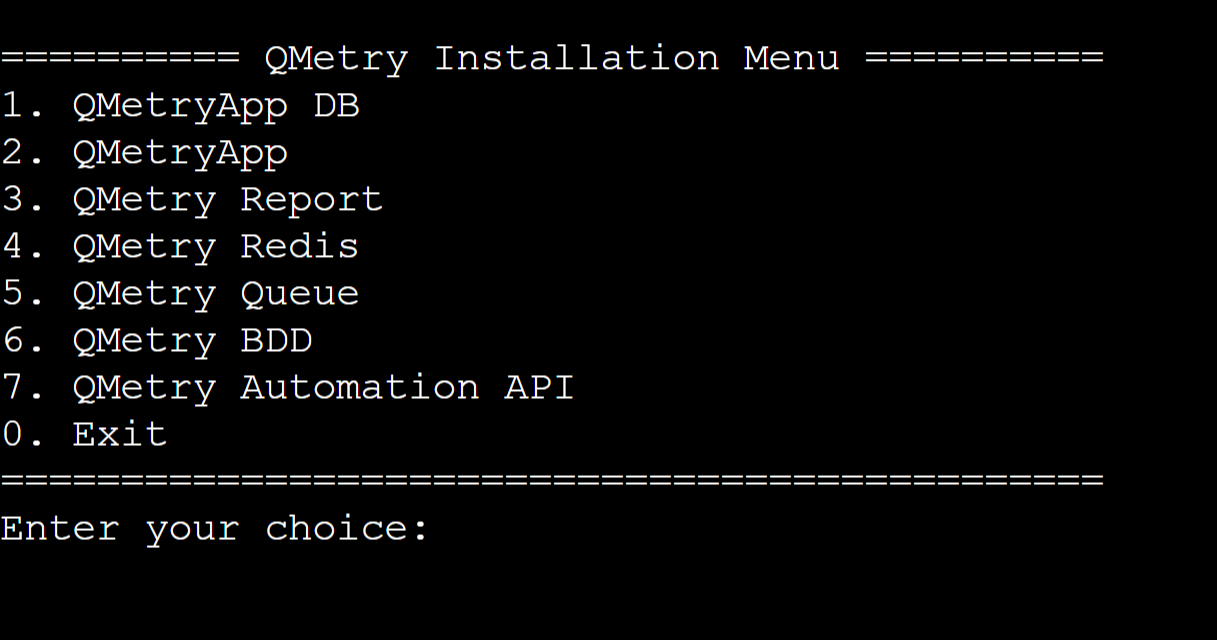
Enter the report configuration parameters.
Options
Details
Example
Enter App Database Host URL
Enter Database Host Public IP/DNS of QMetry application.
10.0.8.166
Enter App Database Port
Enter Database Port of QMetry application.
3306
Enter App Database Username
Enter Database username of QMetry application.
root
Enter App Database Password
Enter Database password of QMetry application.
root
Enter App Database Schema Name
Enter Database schema name of QMetry application.
qmetry
Enter Report Database Host URL
Enter Database Host Public IP/DNS of QMetry Report.
10.0.8.221
Enter Report Database Port
Enter Database Port of QMetry Report Database.
3306
Enter Report Database Username
Enter Database username of QMetry Reports Database.
root
Enter Report Database Password
Enter Database password of QMetry Reports Database.
root
Enter Report Database Schema
Enter Database schema name of QMetry Reports Database.
qtmanalytics
Enter MQ URL
Enter MQ Active URL
tcp://10.0.8.166:61616
Enter MQ UserName
Enter MQ Username
admin
Enter MQ Password
Enter MQ Password
admin
Enter maximum memory to allocate for CDC app in GB
Maximum memory allocation for the CDC container:
Entered memory would be used by the sync job while running full sync of data.
Enter 25% of total memory available on the server. For example, if the memory on the server is 24 GB, enter 6.
A minimum of 4 GB memory must be allocated.
To check the total memory, run the command: free -h
4
Enter maximum memory to allocate for Sync app in GB
Maximum memory allocation for the Sync container:
Entered memory would be used by the sync job while running full sync of data.
Enter 70% of total memory available on the server. For example, if the memory on the server is 24 GB, enter 17.
A minimum of 8 GB of memory must be allocated.
To check the total memory, run the command: free -h
4
Enter number of CPU’s to allocate for CDC app
Number of CPUs to allocate for the CDC container. (The default is 4)
4
Enter number of CPU’s to allocate for Sync app
Number of CPUs to allocate for the Sync container:
Allocate 70% of the available CPUs. For example, if CPU has 8 cores, enter 6.
A minimum of 4 CPU cores must be allocated.
To check total CPUs, run the command : lscpu
4
Wait for the containers to be created. QMetry then runs a full sync. When the installer finishes, it displays the following message:
QMetry Report installation is complete
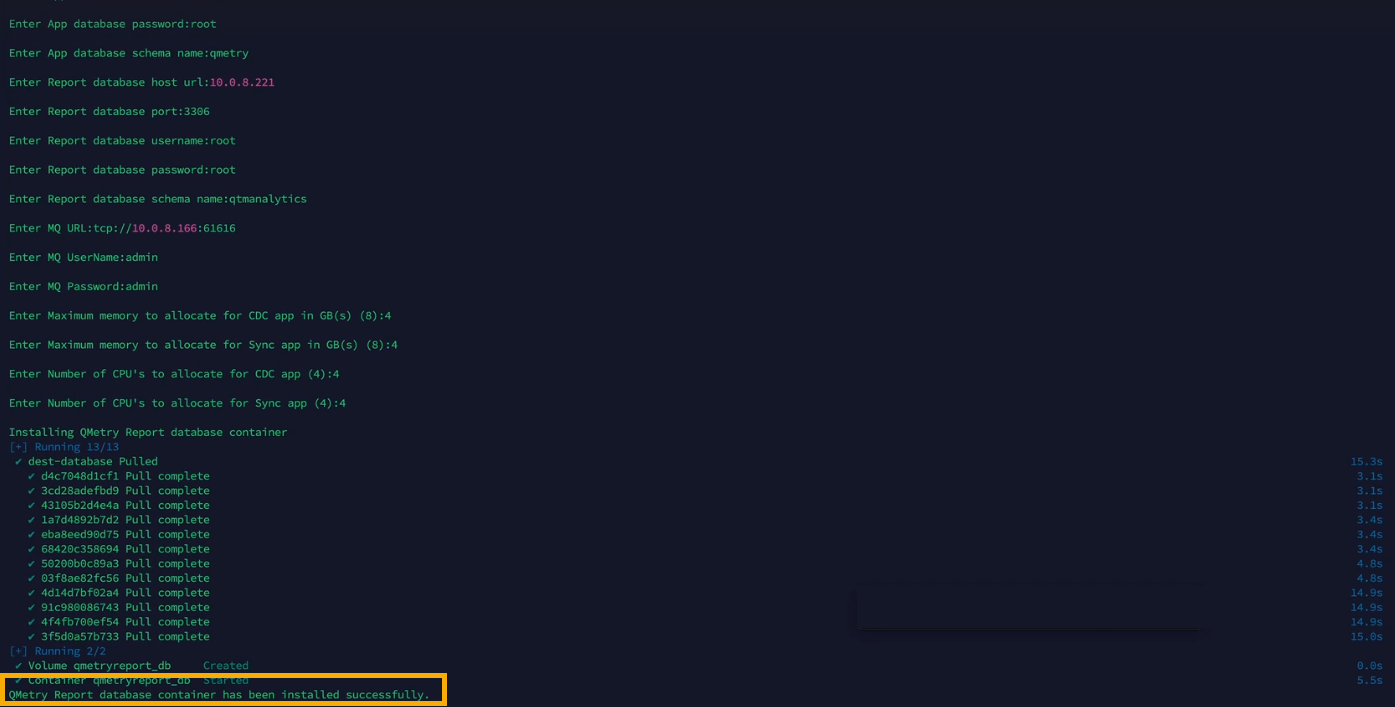
Enter 0 to exit the installer.
Run the following command to verify that the report containers are running:
docker ps
In QMetry, open your profile, and then enter the QMetry Application URL in the Base URL box.
Log in to QMetry as an administrator, and then select Customizations.
Select Insight Configuration, and then select the Database Configuration tab.
On the Database Configuration tab, enter the following values:
Host: Enter Report Database Host URL from the report configuration table.
Port: 3306
Username: <Enter Report database username>
Password : <Enter Report database password>
Database Name: <Report DB schema specified during installation>
Click Test to verify the connection, and then click Test & Save.
Set up the report data sync
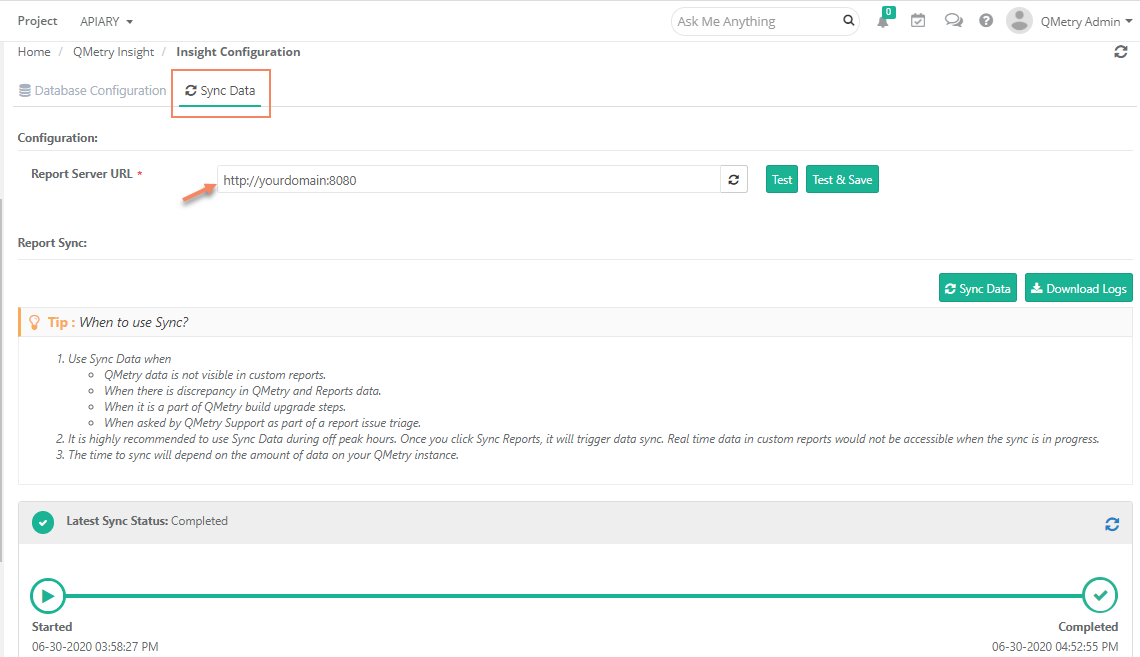
Select the Sync Data tab.
In the Report Server URL box, enter the URL of the report server, including port 8080, for example http://<report_server_domain>:8080. Make sure that port 8080 is open on the report server.
Click Test to verify the connection, and then click Test & Save.
Note
Run Sync Data once, right after you install QMetry Reports. The sync time depends on the amount of data in QMetry. You can monitor the sync progress and status in the interface.
Custom reports are unavailable while the sync runs, so run it during off-peak hours. QMetry remains available. You can use QMetry Reports after the sync completes.
Get Support
If you have an installation issue, open a ticket on the Support Portal.