QMetry App DB Upgrade to MySQL v8.4.8 for 3 Tier RHEL8, RHEL9, RHEL10 & Podman
This topic describes how to upgrade the QMetry application database and the QMetry Reports database to MySQL v8.4.8 on servers that run Red Hat Enterprise Linux (RHEL) 8 or RHEL 9 and host QMetry in Podman containers.
Prerequisites
Before you upgrade, ensure that you meet the following prerequisites:
The MySQL version of both QMetry Reports and the QMetry application is 8.0.33 or later.
QMetry is not in use, and no operations or traffic are running on QMetry.
You have root or sudo access.
You have
QMetry_RHEL_Installer.zip, which you receive from QMetry Support.You are logged in to the container registry with the credentials shared with your installation package. To log in, run the following command.
podman login <registry_url>.
App DB Upgrade to MySQL v8.4.8
Note
The upgrade can take time, depending on the amount of data in the database.
IMPORTANT: Backup your existing QMetry Database.
Back up your existing “qmetry” database. You can change the username, password, and backup file location (default is /opt).
podman exec qmetryapp_db sh -c 'exec mysqldump -uroot -p<password> --triggers --routines --hex-blob --single-transaction --no-create-db qmetry' > /opt/qmetry_backup_$(date +%F).sql
Example 11.podman exec qmetryapp_db sh -c 'exec mysqldump -uroot -pqmetry --triggers --routines --hex-blob --single-transaction --no-create-db qmetry' > /opt/qmetry_backup_2026-01-15.sql
Make sure your database is backed up correctly and available for use if needed.
Stop the QMetry application. Go to the QMetry application server and run the following commands:
systemctl stop qmetryapp
Copy the
QMetry_RHEL_Installer.zipfile to the server with the QMetry DB container, go to that directory, and run the command.unzip QMetry_RHEL_Installer.zip cd QMetry_RHEL_Installer
Run the script.
sudo su
chmod +x upgrade.sh
sh upgrade.sh
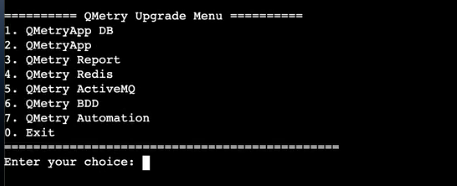
At the QMetry Upgrade Menu, enter 1 to upgrade the QMetry application database.
Configure the parameters:
Options
Description
Default Value
Example
Do you have QMetry's application container running on this machine? (Y/N)
Enter N for a 3-tier installation.
Y
Y
Do you have QMetry's database container running on this machine? (Y/N)
Enter Y for a 3-tier installation.
Y
Y
Enter the name of QMetry's database container
Enter the name of QMetry Database container.
-
qmetryapp_db
Enter current Database Host
Enter Database Host Public IP/DNS of QMetry application.
-
10.0.0.16
Enter current Database Port
Enter Database Port of QMetry application.
-
3306
Enter current Database User
Enter Database username of QMetry application.
-
root
Enter current Database Password
Enter Database password of QMetry application.
-
-
Enter current Database Schema
Enter Database schema name of QMetry application.
-
qmetry
Steps to upgrade QMetry to the latest version
Follow the document QMetry Upgrade Guide for RHEL8, RHEL9 and Podman (from QMetry v8.16.0.1 to the latest version) to upgrade to the latest version.
Clean up data from MySQL 5.7.28 container
Perform this section only after you complete the steps in Steps to Upgrade to MySQL v8.4.8 DB Container and Steps to Upgrade QMetry to the Latest Version.
This step is optional, but we recommend it to clean up the residual components and free up disk space on the server.
Note
The old QMetry database container and all associated data will be permanently removed once you perform these clean up steps. This action is irreversible.
Before you begin, ensure that the QMetry upgrade is successful, and you have fully restored the data. Proceed with these steps only after everything functions properly.
Cleanup Commands:
Run the following commands on the server where the QMetry DB container is located:
podman rm qmetry_rds_1
podman volume rm $(podman volume ls -qf dangling=true)
podman image prune -af
Note
If you are upgrading the QMetry app to version 8.20.0.2 or above, it is essential to update the Automation API to the latest version. Refer to Install Automation API Feature (RHEL8 & Podman).
Get Support
If you experience any issues during the upgrade, create a support ticket on the Support Portal